Showing posts with label Cheesecake. Show all posts

Friday, April 19, 2013

Day 61 - Raspberry Swirl Cheesecakes

Friday, April 19, 2013

Today I decided to make Raspberry Swirl Mini Cheesecakes. I tried to make them once before and it was a total disaster... I clearly wasn't paying attention when I made them and forgot to add sugar! Oops!

Today I was fully focused and ready to make these delicious looking treats. I love mini cheesecakes and they're always a hit when I make them for parties, so I wanted another version to have in my recipe collection.

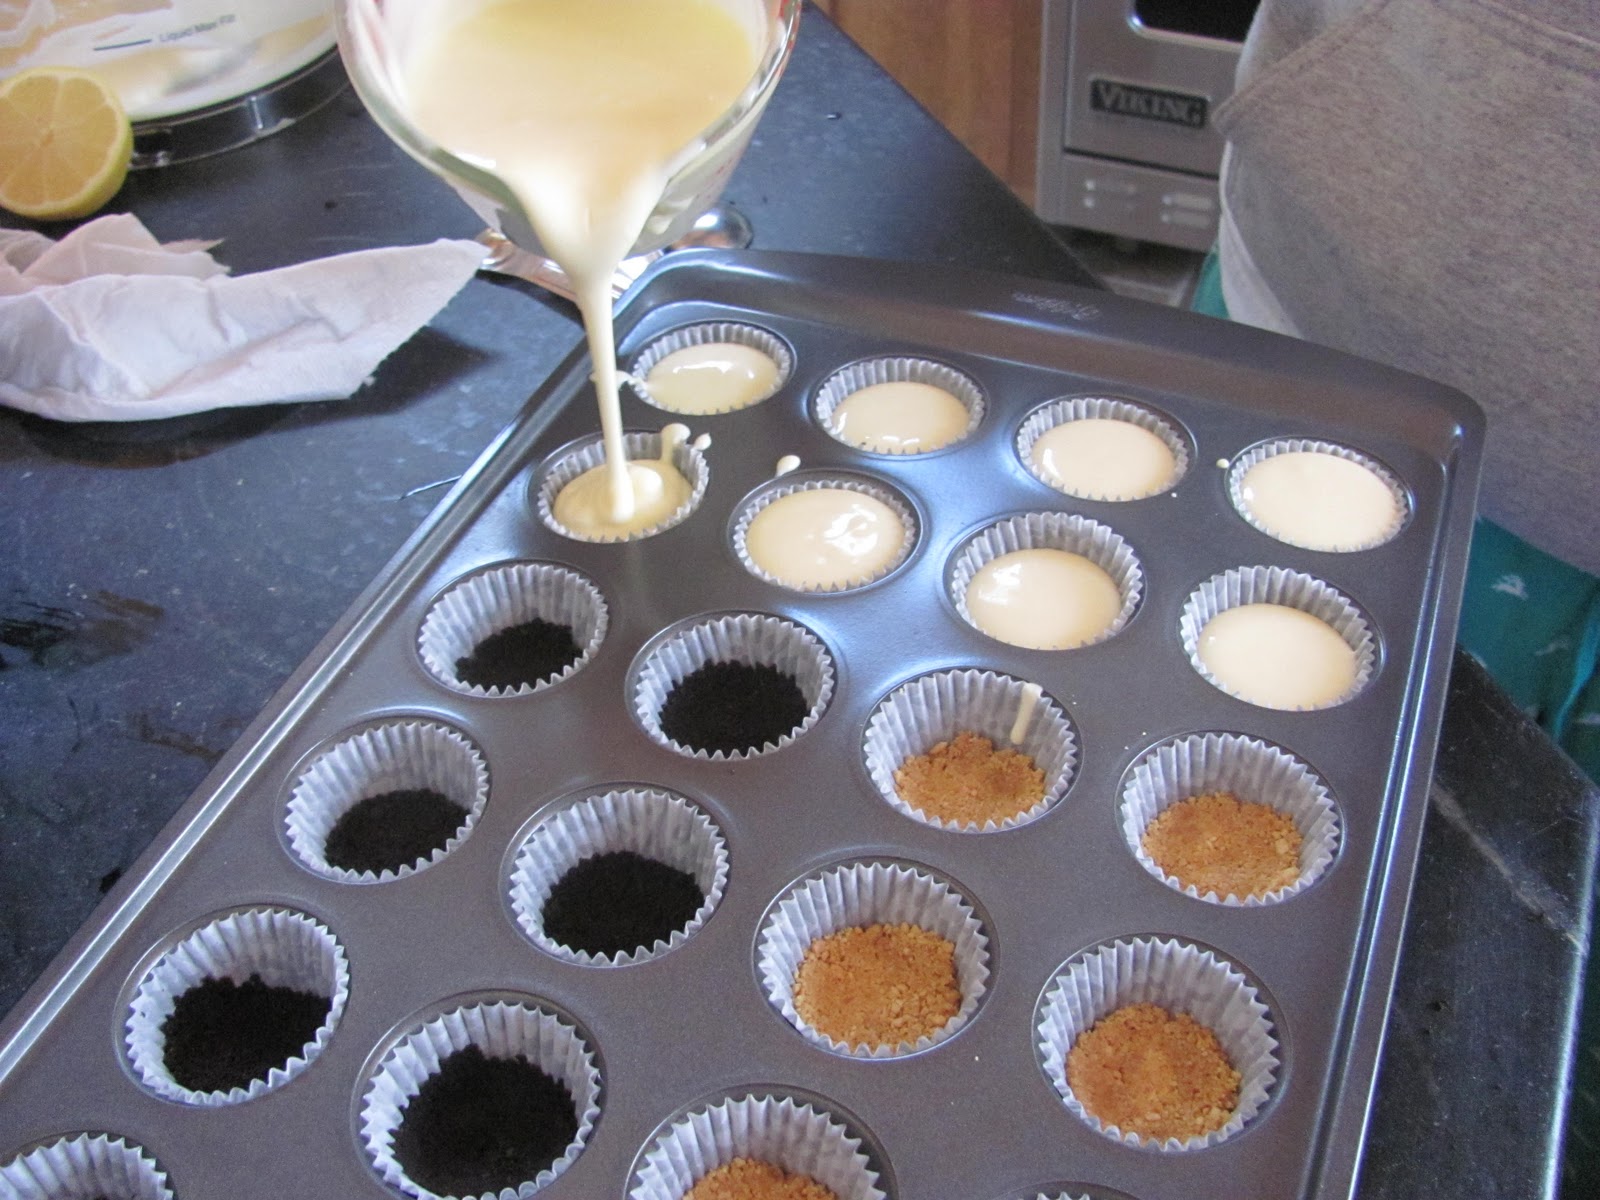
I started by making the crust for the cheesecakes. I like to make both graham cracker crusts AND chocolate cookie crusts. The crusts are just made from cracker or cookie crumbs, melted butter, and sugar. The mixture is then pressed into the bottom of lined mini cupcake cups.

Next, I made the cheesecake filling which as has all the classic ingredients: cream cheese, eggs, vanilla, sugar (very important I learned), and a pinch of salt. I pour the cheesecake mixture over the crusts and they were almost ready for the oven.
The last component is the raspberry sauce which takes these cupcakes from average to amazing! The raspberry topping is made from fresh raspberries and sugar, that's it! I just blended the two together in a food processor, and put the mixture through a mesh strainer to remove the raspberry seeds.


I dotted the top of the cheesecakes with the raspberry sauce and swirled it in with a toothpick. The vibrant red color looked amazing!

The cheesecakes bake at 325 for about 18 minutes. Once the cheesecakes come out of the oven, I let them cool and then stored them in the refrigerator. Can't wait to share these with my friends and neighbors (it would be too dangerous to keep these bite sized treats in the house!).


Sunday, September 16, 2012

Day 55 - Oreo Cheesecake Bites

Sunday, September 16, 2012

Today I am making a dessert that I made for the first time on Labor Day Weekend, Oreo Cheesecake Bites. They were such a hit, I decided to make them again today and blog about it!

This recipe is super easy, it starts with the crust which is just two sleeves of crushed Oreo's and melted butter. They are mixed together until they form a sand like consistency, and then the mixture is pressed into the bottom of a baking dish.
Oreo Crust
Next, I made the filling which starts with cream cheese and sugar being creamed together. Once the mixture is smooth, I added sour cream and vanilla extract, followed by four eggs which are added in one at a time. Lastly, the remaining crushed Oreo's are folded into the mixture and it is poured over the Oreo crust.


Finished batter
Ready for the oven
The cheesecake bakes for about 40 minutes and then is left out to cool before being refrigerated. The last step before serving these is to cut them into bite size squares and drizzle with melted chocolate. These are seriously so delicious, I have a feeling I will be making these again soon!

Finished product :)

Monday, August 27, 2012

Day 53 - Cheesecake Filled Strawberries

Sunday, September 26, 2012

I'm sad to say that the end of summer is upon us. My mom is back in Italy, and Michael is leaving tonight. We are all getting back into our fall routine. For a sweet send off, I made a delicious no-bake summer dessert, Cheesecake Filled Strawberries. I've seen this dessert on the internet many times and have always wanted to try it. I love strawberries and I LOVE cheesecake, there isn't a better combo that I can think of.

The recipe is simple; just hollow out a bunch of strawberries and whip up the cheesecake filling which is made of softened cream cheese, confectioners sugar, and vanilla extract. THAT's it! I used a pipping bag to squeeze the cheesecake filling into the strawberries, which made the process quick and easy [and of course made them look really pretty]. Once each strawberry was filled, the last step was to dip the top in graham cracker crumbs because what's a cheesecake without a graham cracker "crust?"
Hollowed out Strawberries
Cream Cheese, Confectioners Sugar, Vanilla
Finished Cheesecake Filling 
Filled Strawberries
Cheesecake Filled Strawberries
I stored these in the fridge until we were ready to devoure them. I made a large plate of these and they were gone the same day I made them! I guess next time I should double the recipe!

Not only did this dessert look beautiful, it was absolutely delicious. I would say that is a success!

YUM!
Stay tuned until next time :)

Monday, February 6, 2012

Day 40 - Chocolate Chip Cooke Cheesecake Bars

Sunday, February 5, 2012 aka SUPER BOWL SUNDAY!

Today is Super Bowl Sunday and I am making a few treats to go along with all the wings, dips, and chili that we will be enjoying today with friends.

I decided to make brownies from scratch [which I have made many times before] and chocolate chip cookie cheesecake bars. Yep, I said it, chocolate chip cookies and cheesecake in ONE dessert! I saw these on Pinterest.com and have been dying to make them! Besides the fact that they look ridiculously delicious, they look sooo easy to make as well!

The ingredients are as follows:

2 Packages or rolls of prepared chocolate chip cookie dough (I used Tollhouse)
Cream Cheese
Sugar
Eggs
Vanilla Extract


I suppose you could make your own cookie dough [for choco chip cookies I usually make the recipe on the back of tollhouse chocolate chips] but I figured, why make more work for myself??

All you do is grease a 9x13 glass baking dish and press one package of the cookie dough onto the bottom to cover the surface.


Next, I mixed the cheesecake mixture together [cream cheese, sugar, eggs, and vanilla] until it was smooth. The cheesecake batter is then poured over the cookie layer.

Cheesecake Mixture

Finally, I took the second package of cookie dough and did my best to cover the top of the cheesecake layer.
Top layer of dough 
Ready to bake
The bars bake for 45 minutes and let me tell you - they smell amazing!


When they came out of the oven they were golden brown and the center was slightly firm. After they cooled, I put them in the refrigerator. They are cut just before they are ready to be eaten! Can't wait to enjoy these later while watching the game!

Finished!

Monday, February 6, 2012

Ok, I had to write again to say these were incredible! Everyone at my house loved them! The cookie layers were slightly crisp and the cheesecake layer was moist and creamy. I wasn't sure how the cookies would bake and not overcook the cheesecake, but man it came out perfect! I would definitely recommend trying these!! 

Tuesday, January 17, 2012

Day 38 - Black Bottom Cupcakes

Monday, January 16, 2012

Today I decided to do another little baking session. My Dad was away in LA for the long weekend visiting my sister, and is coming home later tonight. I decided to bake a little home coming treat for him to enjoy after dinner.

I found a recipe for Black Bottom Cupcakes on Pinterest.com [surprise, surprise] and it originated from a blog called "Bake Me More." The cupcake is a devils food cake base with a chocolate chip cream cheese mixture dolloped on top [in place of frosting]. They looked really cute and the cream cheese mixture actually looked like hearts in the pictures from the blog.

I decided to make it easy for myself and go with the store bought cake mix - Pillsbury Devils Food Cake [always delicious]. I whipped up the batter in minutes and then started on the cream cheese mixture which was just a bar of softened cream cheese, sugar, an egg and mini chocolate chips. It called for "softened cream cheese" but apparently mine wasn't soft enough [hello impatient] and so I had a hard time getting the mixture to be really smooth. I figured it wouldn't be a problem since it was just going to get baked anyways.

Prepared cake batter

Chocolate chip cream cheese batter

 I filled the cupcake liners with a little bit of the chocolate cake batter and then dolloped the cream cheese mixture on top. I started off really heavy handed and put a bit too much cream cheese on each one. As I progressed, I scaled back on the amount of cream cheese I put on each cupcake and it seemed to look better [and more like the blog].
Cupcakes ready to bake
The cupcakes baked for about 20 minutes and didn't exactly have the heart shape cream cheese top like I had hoped. The cream cheese [since I put way too much on some of them] spread out over the top of the cupcake and although it didn't look super pretty, I was sure it would still taste delicious.


Cupcakes [with a lot of cream cheese!]


A little less cream cheese :) 
My Dad and I each sampled one after dinner and they were delightful! The cake was moist and the cream cheese added a sweet and creamy touch, which is the reason why you don't need frosting on these cupcakes.
So good!

These were so easy and yummy - just think of the varieties you can make with these... red velvet cupcakes with cream cheese on top... yum!

Stay tuned until next time :)

Sunday, January 16, 2011

Day 11 - Mini Cheesecakes

Sunday, January 16, 2010

Cheesecake Experience - Part 2

Today we turned our love of cheesecake into bite size treats! We made a simple filling of cream cheese, sugar, eggs, and lemon juice. We decided that two types of crusts would be better than one, so half of our tray was filled with chocolate and the other with regular graham cracker crumbs. We used a cookie scooper to press down the crumbs which made the process so much faster considering the tray had 24 cups!!

After we poured the filling in to the tray, we put them in the oven and set the timer for 6 minutes. After the time was up, we dropped chocolate chips in some of the mini cheesecakes and swirled them around with a toothpick. We sent them back to the oven for about 10 more minutes. After they were cooled, some mini's received a caramel topping and off to the refrigerator they went!


Today's baking was a short and simple way to whip up a dessert a day ahead of time for any occasion. You will end up with a variety of mini treats that you didn't spend all day long making! What a lovely way to end our cheesecake experience!

Stay tuned for next week...

Sunday, January 9, 2011

Day 10 - Triple Chocolate Cheesecake

Sunday, January 9, 2011

HAPPY NEW YEAR!

While we are not enjoying all of this snow, we are hard at work in the kitchen!! This is Part 1 of a Cheesecake experience. We tried out Martha Stewart'sTriple Chocolate Cheesecake recipe this week. One word of advice is if you ever try this recipe out you will need the biggest food processor  you can find! Thankfully, Lele has a 14 cup processor. This was a pretty much traditional process, however, for the chocolate portion we used melted semi-sweet chocolate instead of cocoa powder. We felt this would add the right amount of chocolate to calm our sweet tooth!

To start, we ground up chocolate wafer cookies and mixed them with a little melted butter. We pressed the crumbs down into the spring form and baked it for 10 minutes. While it was cooling we combined softened cream cheese, sugar, and salt. After this mixture was smooth and glossy, we added 3 eggs, sour cream, and finally the melted chocolate. This cooked for one hour then stayed in the oven (with the heat off) for one additional hour to cool. We are letting this refrigerate over night and will add a chocolate ganache layer tomorrow.


We will keep you posted on how it came out and next week we will make a variety of mini cupcakes- plain, chocolate swirl and caramel swirl. Stay tuned!

Ok so its Monday and I was ready to make the ganache for the chocolate cheesecake. I made the ganache using heavy cream and semi sweet chocolate chips. I heated the milk and off the heat swirled in the chocolate chips until I had a smooth, shiny chocolate mixture. I spread the ganache over the cheesecake which had been chilled over night (you can see it in the photo below).


I put the cake back into the refrigerator to let the ganache set to a firm chocolate layer. It only took a few minutes for the ganache to set and it was ready for us to taste. It was delicious! It was decadent and and creamy. The chocolate surprisingly wasn't too overwhelming - it was perfect. You could still really taste a traditional cheesecake flavor with a hint of chocolate. This is a perfect, easy dessert to make for any special occasion (I'm thinking Valentine's Day) or just any day for a chocolate lover in your life!