Saturday, February 25, 2012

Day 44 - Zebra Cake

Saturday, February 25, 2012

Today Joanne and I are baking together!! It has been soooo long since we baked together, so I am ecstatic! I think the cake we are making today should be to celebrate our time together! We are attempting to bake a zebra cake that I saw somewhere online. Since I couldn't remember where I saw the recipe, I googled "how to make a zebra cake," and I came upon a website called "My Cake School" that gives tutorials on how to make various cakes. The instructions on the website [along with pictures] made it seem really easy to make.  

All you do is start with two boxed cake mixes, one chocolate and one vanilla, and prepare it as listed on the back of the box. The website actually recommends not using a cake mix with pudding in it (such as Pillsbury) because the batter is quite thick, but of course that's the one I bought, so Joanne and I had to thin out the batters with a little bit of extra water. 
Chocolate Cake Batter
White Cake Batter
The way to make the zebra stripes inside the cake is to layer the chocolate and vanilla batter in the cake pans. So in a buttered and floured cake pan, we started with about a half a cup of the chocolate batter, and then an equal amount of the vanilla batter right on top of the chocolate. As you layer the batter, it starts to spread out to the edges of the pan (hence why the batter shouldn't be too thick). It's actually easier to understand through photos so see below: 


Once the cakes were layered, they baked for about 35 minutes. We let them cool on a rack and then frosted them with vanilla icing. We couldn't wait to cut into the cake to see if the zebra effect actually worked! 
Just out of the oven
As you can see below… IT WORKED!! 
Finished Zebra Cake!!!!

YUM
We couldn't be happier that the zebra effect worked and I would also like to state that the cake itself was DELICIOUS! Of course since it came from a boxed mix, it was super moist and so yummy! 

Who wants a zebra cake for their birthday?! 

Friday, February 24, 2012

Day 43 - Oreo Truffles

Friday, February 24, 2012

Today is Friday and I woke up unexpectedly to SNOW on the ground! I have to admit that I was pleasantly surprised since we have had ZERO snow this winter! I was so cozy today sitting by the fire and I got motivated to make a little treat. I decided to make Oreo Truffles to bring to a girls night out tonight. I have been wanting to make this recipe ever since I saw on Pinterest.com, and since they look so easy [and don't actually require any baking], I figured tonight was the perfect night to make them!

The only ingredients needed are a package of Oreo's, one bar of softened cream cheese, and your choice of chocolate chips [I used semi-sweet today].


First, I crushed up the Oreo's [about two sleeves] in a food processor until they became a fine crumb, and poured them out into a bowl. Next, I added the softened cream cheese [I started by adding half the bar] and blended it with the Oreo crumbs until it becomes almost paste like. If the mixture is too dry, you can just add more cream cheese, which I ended up doing, to get the right consistency. 
Oreo Cookie Crumbs
Mixing the crumbs with cream cheese
I rolled small balls of the mixture [about a tablespoon] and placed them on a cookie sheet covered in parchment paper. When all the truffle's were rolled, I placed them in the freezer to harden.

Truffle's
While the truffle's were chilling in the freezer, I melted the semi-sweet chocolate chips in the microwaves [in 30 second increments, about 3 times]. I then took the truffle's out of the freezer and dipped them in the chocolate. The chocolate dries quickly, so before they set, I sprinkled the top with left over Oreo crumbs.
Finished Truffle's!
These need to be kept refrigerated [if you actually have any left over] because you will notice that the chocolate will start to melt fairly quickly. These are soo delicious, I have no doubt that they will be gone in seconds!
Do these not look awesome?!
I plan on doing some more baking tomorrow with Joanne, so stay tuned :)

Sunday, February 19, 2012

Day 42 - Red Velvet Cupcakes

Sunday, February 19, 2012

Today I decided to attempt red velvet cupcakes. I have honestly never been a fan of red velvet cake, but my Dad has been begging me to make these for so long, I decided to give in!

The recipe I'm using today comes from Paula Deen on Food Network. Putting together the batter was quite simple. I started by mixing the dry ingredients together in one bowl [flour, sugar, salt, baking soda & cocoa powder] and the wet ingredients in a separate bowl [eggs, vegetable oil, vanilla, buttermilk, red food coloring & white vinegar]. The dry ingredients are slowly added to the wet ingredients until the batter comes together and is a bright red color. The batter is poured into cupcake tins and they bake for about 20-22 minutes.

RED velvet batter!
Ready for the oven
While the cupcakes baked, I put together the frosting which was really simple. I beat unsalted butter and cream cheese together until smooth, and then slowly added in the confectioners sugar. When it is all combined, I added in vanilla extract and beat until incorporated. The frosting turned out really yummy and not too sweet.

When the cupcakes came out of the oven and cooled, I pipped the frosting on top. I have to admit, they looked really pretty! Since I'm not a red velvet fan, I had my Dad do the official taste test. The verdict? He loved them! He said they were really moist and delicious!

Just out of the oven
Finished cupcakes
Stay tuned until next time :)

Sunday, February 12, 2012

Day 41 - Valentine's Day Special

Sunday, February 12, 2012

Today I am making some Valentine's Day sweets. I started off by making chocolate covered strawberries - the quintessential Valentine's day treat. I found big, beautiful long stem strawberries in the grocery store and I couldn't resist! I decided to dip the strawberries in semi-sweet, milk and white chocolate to have a nice variety. For the white and milk chocolate, I simply melted the chocolate chips slowly in the microwave. For the semi-sweet chocolate, I mixed the chips with heavy cream to make a ganache. Once I dipped each strawberry, I placed them on parchment paper to dry. I'll store these in the refrigerator for later… although I highly doubt these will survive until Tuesday.


Melted Chocolate


Finished!
The second simple treat I decided to make are little pretzel squares toped with Hersey's Hugs and Valentine's Day M&M's. All you do is line up the pretzels on a cookie sheet and top them with the Hugs [Kisses can of course be used but I love the white color of the hugs for Valentine's day]. The are put in a 350 degree oven for a few seconds, just until they soften [be careful that they don't start to melt, the hugs seem to heat up quicker than kisses!] When they came out of the oven, I topped each hug with an M&M. Since the white chocolate seems to get really melty during this process, I actually put them in the fridge to harden after they each had an M&M on top. Even though these are a really simple treat [and really require NO baking], I assure you people LOVE these. 

Hugs ready for the oven!


Well that's all for now, hope everyone has a LOVEly Valentine's day :)

Monday, February 6, 2012

Day 40 - Chocolate Chip Cooke Cheesecake Bars

Sunday, February 5, 2012 aka SUPER BOWL SUNDAY!

Today is Super Bowl Sunday and I am making a few treats to go along with all the wings, dips, and chili that we will be enjoying today with friends.

I decided to make brownies from scratch [which I have made many times before] and chocolate chip cookie cheesecake bars. Yep, I said it, chocolate chip cookies and cheesecake in ONE dessert! I saw these on Pinterest.com and have been dying to make them! Besides the fact that they look ridiculously delicious, they look sooo easy to make as well!

The ingredients are as follows:

2 Packages or rolls of prepared chocolate chip cookie dough (I used Tollhouse)
Cream Cheese
Sugar
Eggs
Vanilla Extract


I suppose you could make your own cookie dough [for choco chip cookies I usually make the recipe on the back of tollhouse chocolate chips] but I figured, why make more work for myself??

All you do is grease a 9x13 glass baking dish and press one package of the cookie dough onto the bottom to cover the surface.


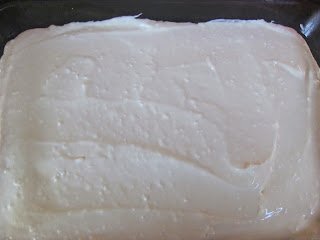
Next, I mixed the cheesecake mixture together [cream cheese, sugar, eggs, and vanilla] until it was smooth. The cheesecake batter is then poured over the cookie layer.

Cheesecake Mixture

Finally, I took the second package of cookie dough and did my best to cover the top of the cheesecake layer.
Top layer of dough 
Ready to bake
The bars bake for 45 minutes and let me tell you - they smell amazing!


When they came out of the oven they were golden brown and the center was slightly firm. After they cooled, I put them in the refrigerator. They are cut just before they are ready to be eaten! Can't wait to enjoy these later while watching the game!

Finished!

Monday, February 6, 2012

Ok, I had to write again to say these were incredible! Everyone at my house loved them! The cookie layers were slightly crisp and the cheesecake layer was moist and creamy. I wasn't sure how the cookies would bake and not overcook the cheesecake, but man it came out perfect! I would definitely recommend trying these!!